The Most UNDERRATED Climbing Skill (3 Steps to Improve High Feet, Open Hip Mobility)
Hooper’s Beta Ep. 87
INTRODUCTION
Foot technique and lower extremity mobility can make or break your ability to send a climb. Have you ever seen someone struggle on a climb that is way below their strength level simply because they're unable to achieve a certain position with their foot? Or, do you find yourself standing there in jealousy while you watch someone with amazing hip mobility do beta you could never even dream of? Well, set that jealousy aside, and focus on this video as we go through a 3 part system to improve your high foot technique.
In this video, we will go through a three step process (that can be trained quite easily) that will improve your high foot technique which may make or break your ability to send a climb! We will cover both off AND on the wall drills to make sure you can incorporate your training with your climbing.
Remember, developing good forwork is essential if you want to progress in climbing. So if that’s something you're into, which you obviously are because you’re here on our channel, then let’s get into it!
Remember that all this information and more is written out on the show notes on our website for your convenience!

PART I: STRETCHING
Why Stretching?
First…. We have to stretch!
Stretching is a huuuuge part of this process. If we don’t have the range of motion or mobility needed to perform the skill we want to do, we are pretty much screwed right out of the gate. Stretching will improve that mobility and increase our success with the subsequent drills. I’m going to recommend 3 different stretches that will help improve our hip flexion and abduction ability. These will help us get our feet higher and higher, while also allowing us to keep our hips closer to the wall.
Note: some of these stretches may be easier than others. Also, you may find 1 or 2 of the stretches to be more necessary for you than the others. It’s OK to focus on the ones you find more restrictive, but it can be beneficial to still perform all 3 stretches.

The Stretches
Child's Pose
I choose Child’s pose to be our first stretch as it is the least aggressive and most approachable. It is also slightly more modifiable to control if you feel limited in your hip mobility.


To perform a child's pose, place a mat on the ground, and start on your hands and knees with your knees hip distance apart and your feet slightly closer, nearly touching each other. Bring your trunk down towards the ground by sitting your butt down towards your heels and your chest down towards the ground.
Your final position should be your butt resting on your heels with your arms overhead and the chest close to the ground. Your forehead may rest comfortably on the ground if you have the range of motion to do so.
Modifications: to make this even more beneficial, we will add in a side to side stretch with this to really improve the hip flexion on each individual leg. While maintaining the position, with both hands overhead, move both hands over to the left and bring your chest over the left thigh. If you have the mobility, allow your chest to rest on your thigh. If you don’t have the mobility or if this is uncomfortable, use your hands as support, holding your chest up away from the thigh.
Notes: this position can cause some mild pinching in the front of your hip if you have limited mobility. It should decrease as you stretch, but if it gets worse consider seeing a PT as this could be a separate hip issue.
Reps & Hold time: Perform a 30-45 second hold on all 3 positions. Perform once if you have good mobility, or twice if you feel limited and need more repetition before starting the next stretch.
Garland’s Pose
The next stretch we will perform is a garland’s pose, or deep squat. Start in a standing position with feet approximately hip distance apart and slightly externally rotated (or rotated outward). Sit back in your squat as deep as you comfortably can. If you can perform the full squat or natural garland’s pose, you will place your elbows on the inside of your thighs near your knees, and place the palms of your hands together. You will then push your knees out with your hands to feel an added stretch.


If you fall on your butt every time you try this, you may need a little assistance. To work on this position, grab onto a sturdy object (or weight) and keep it in front of you. This will help prevent you from falling backwards while working on your hip mobility.
Advanced Modification: If this stretch is easy for you, then try different feet positions (more narrow or wider). See if you can find any minor limitations and work on those. If not, no worries! Perform a relaxing 30 second hold and move on to the next drill.
Notes: If you notice pain in your knees, you may have tight quads and need to perform daily quad stretching.
If you feel super limited in this position and also feel really limited in the child’s pose stretch, you may be better working on the child’s pose stretch for a while before moving onto this stretch.
If you feel a big pull in the front of your shins or ankles, this is not an ankle limitation, it is simply your muscles trying to pull you forward so you don’t fall on your butt. This is an indication that you have just enough mobility to get in the position, but not enough mobility to relax comfortably in it.
Reps & Hold time: Perform a 30-45 second hold in this position. Then move your feet slightly wider or more narrow (if applicable) and perform another 30-45 second hold. 1 repetition in each location is fine if you are moderately flexible, otherwise perform a second repetition.
Frogger Stretch
The best stretch ever that I always feel slightly awkward doing… the frogger stretch. Definitely check out the video on this one because describing the position is tough in words!


Start in a quadruped (hands and knees) position with your hips slightly forward, or in front of your knees. This part is key and helps with your setup. Start to widen your hips by sliding your knees out to the side, while also turning your feet out. The inside of each foot should be on the ground, and the pressure will likely be on the inside of your knees. Use padding for this one! Don’t put all that unnecessary pressure on the knees. Pad it up.
Next, move from your hands to your elbows and start to sink your hips backwards, trying to line the hips up over the knees. This is when you will likely really feel the stretch. As you feel comfortable, slide your legs slowly further out to the side and sit the hips back further.
Modification: A cool modification for this stretch is to move back up to the hands, and try to drive your hips / groin down towards the ground, this will really work on a functional climbing position.
Reps & Hold Time: This one needs a little more attention. Hold this position for 60 seconds, and perform 1-2 reps, depending on your need.
Frequency: these stretches can all be done multiple times a day! But, they should of course be done BEFORE moving on to phase 2.
PART 2: ACTIVE RANGE & END RANGE MUSCLE ACTIVATION
Now that you have improved your range of motion, we need to learn to move through that motion. That means performing active range of motion drills AND end range muscle activation.
What are active range & end range muscle activation drills?

Simply put, active range of motion drills mean you are using your muscles to move the desired body part or limb through the entire range of motion. Often the end range of this motion can be more difficult to achieve whether that is due to stiffness of the tissue, or capsular limitations. This is enhanced by the end range muscle activation drills. You will assist your body part to the end range with, for example, your hand. You will then activate the muscle in this end range position, and try to hold and slowly lower. This will teach your body how to activate and control the proper muscles throughout the entire range of motion.
High foot active range & end range activation drills
For the purpose of this video, we are going to focus on one specific movement.
A balcony works really well for this, but any flat/blank wall will do just fine as well.
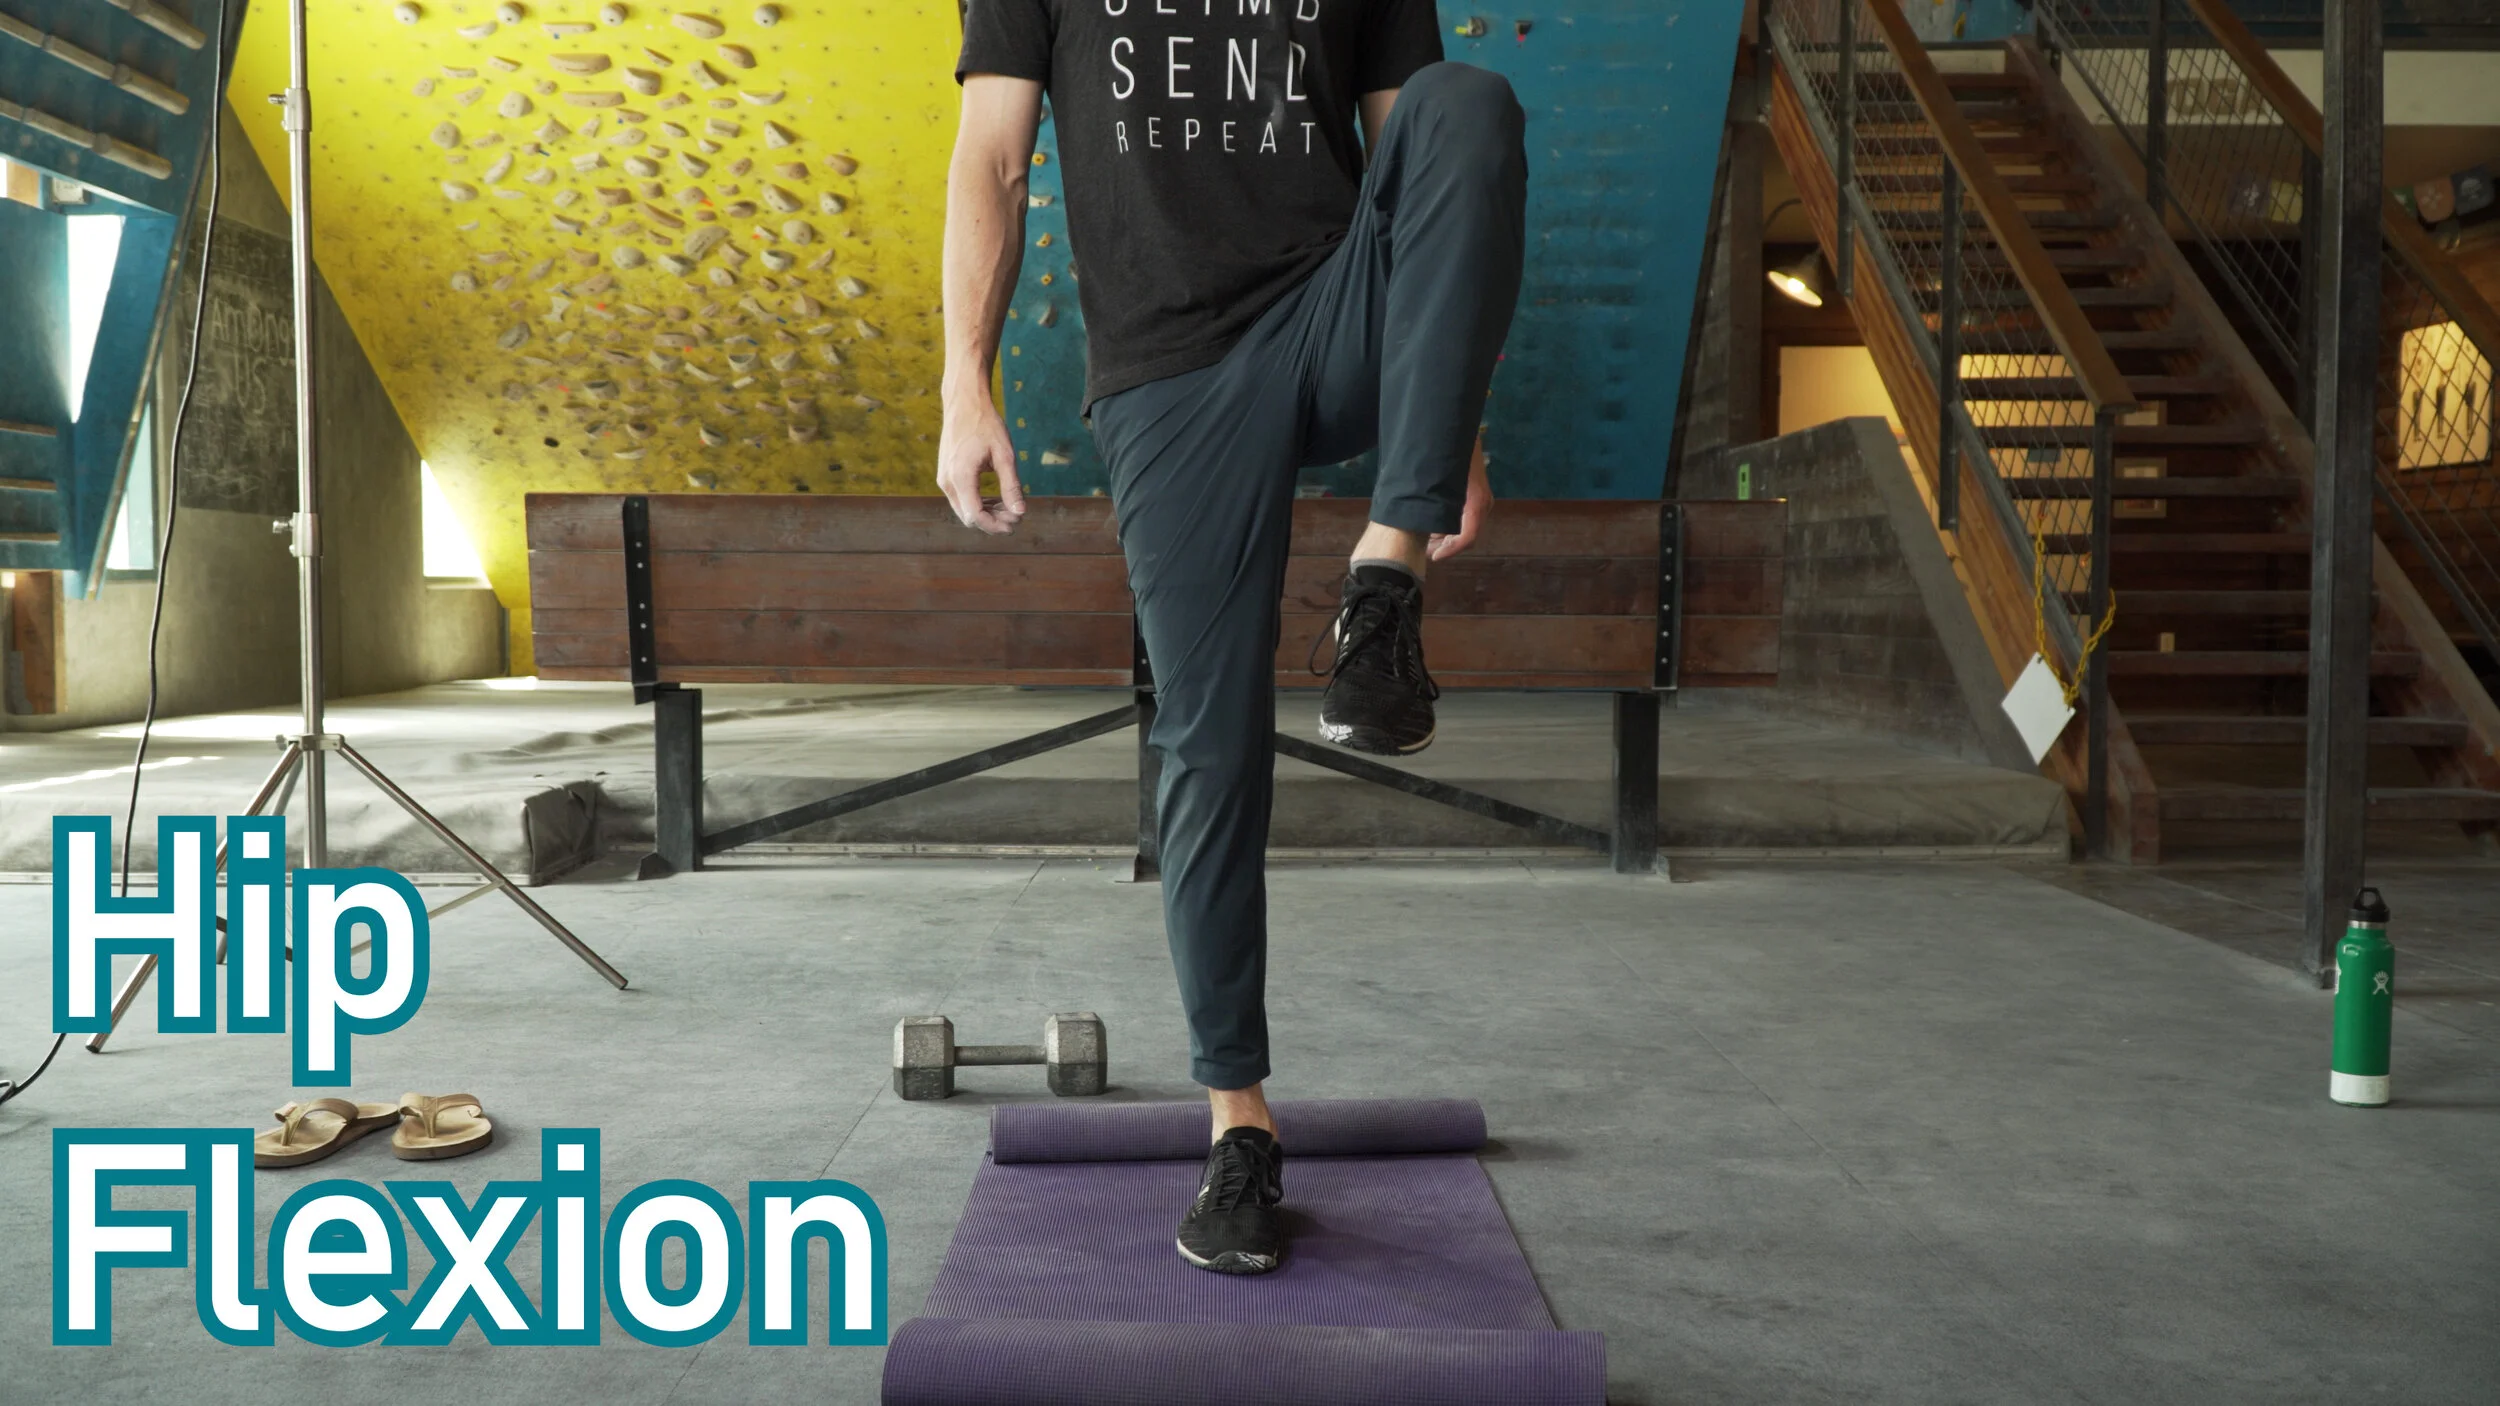
Step up to the balcony or wall with your feet touching the wall. Keep your chest near the wall with your hands to your side. If you’re using a balcony, the hands will simply be on the rail.

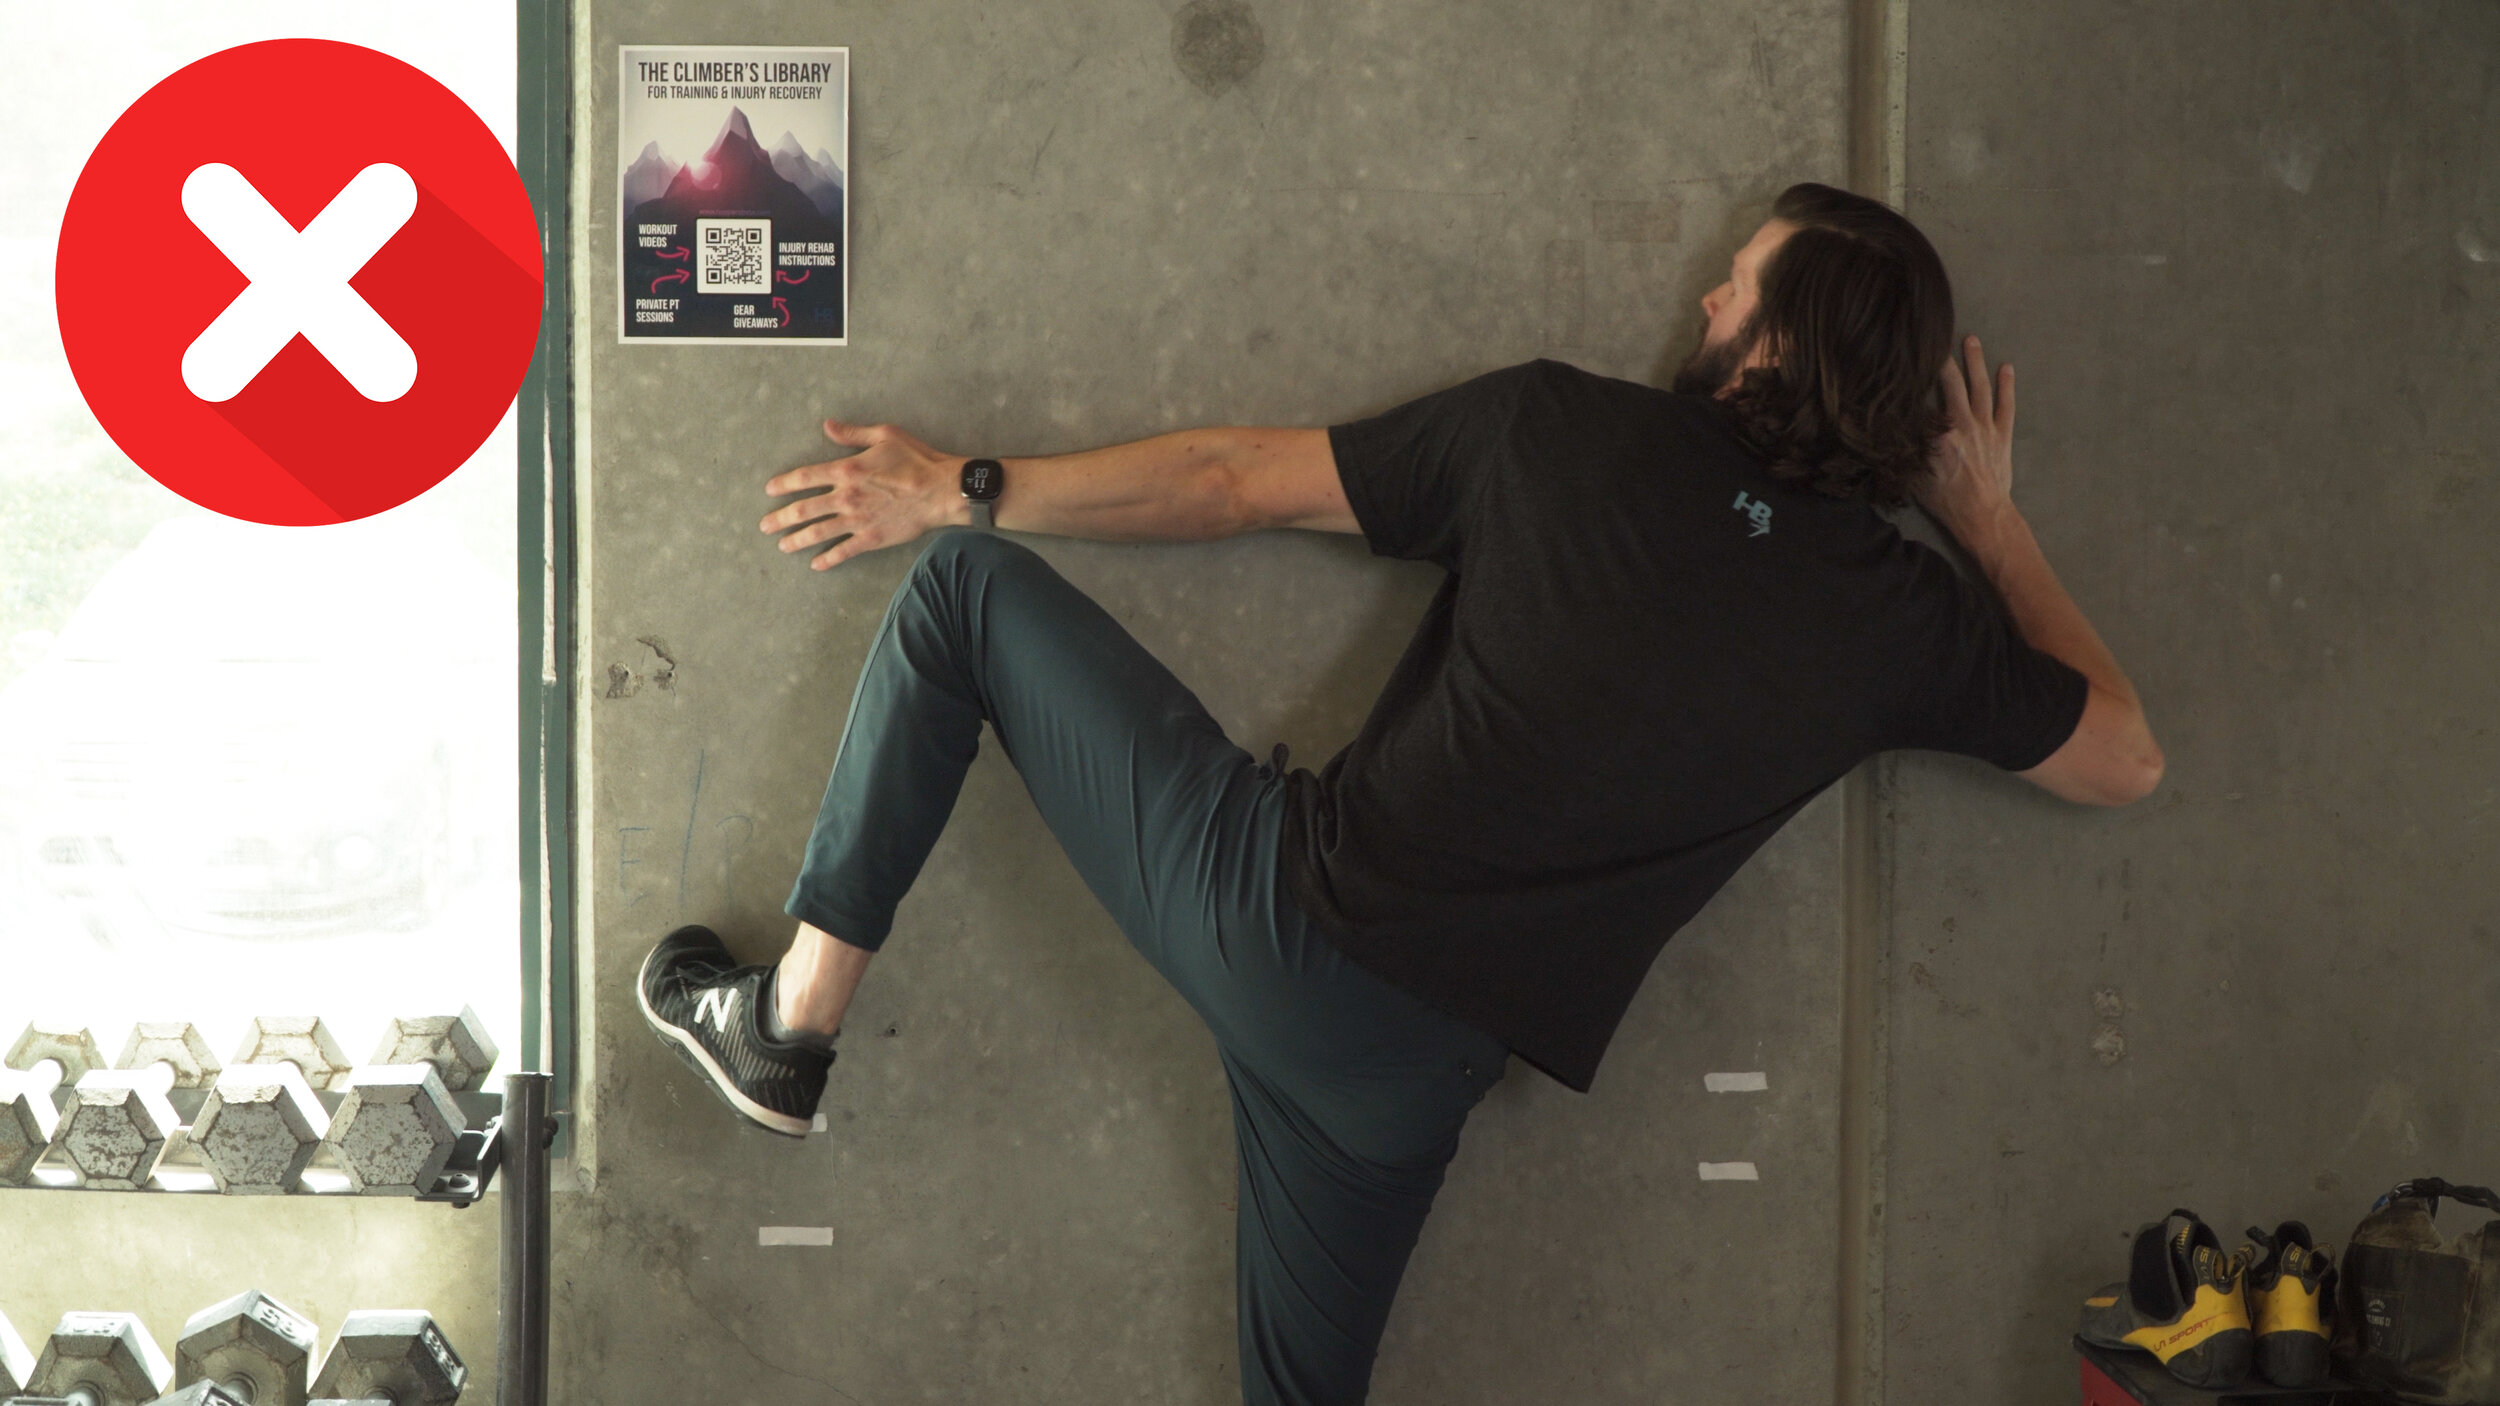
Next, try to hike your foot up as high as you possibly can, while minimizing movement of the trunk (i.e., don’t lean to the side). You can use your hands to minimize this (this is where the balcony / rail comes into play). Minimizing this is important as you don’t want to simply compensate by moving your trunk away, as that may compromise your position on the climb (when you apply this to your actual climbing).
Hold the end range briefly, then lower. Perform 8-10 repetitions, holding for 1 second with each rep.
Next, we will work on the end range activation drills. This will use the same setup as before with the feet close to the balcony. Now, lift your leg up as you did before, but use the same side hand to increase the elevation. Grab the knee or wherever comfortable, and pull the leg higher, as high as comfortably tolerated. Next, activate the required muscles to hold your leg there as best as possible, then slowly release your hand. This will place more work on the hip / leg muscles. You may not be able to maintain this position for long, that’s fine, fight for as long as possible (but not more than 10 seconds) and then slowly lower over 5 seconds. Perform only 3-5 repetitions as tolerated as this is quite fatiguing and may lead to cramping of the muscle.
Once you have completed both drills, switch legs and perform on the opposite side. I recommend only 1-2 sets of this activity on both legs.
PART 3: ON THE WALL DRILLS
The on the wall drills for this are quite simple, yet can be challenging just based on the climbs available to you. Pick a vertical wall to begin with as it will allow you to work more on control and stability. Next, as you're climbing, skip foot holds! Find a high foot, and work on hiking that foot up there as high as you comfortably can, while maintaining a similar body position (aka don’t shift your body / trunk way to the side). Once your foot is secure on the wall, use the single foot and opposite arm to pull yourself up. Rinse and repeat! This should be a slow and controlled drill. Make this harder by progressively picking smaller foot and hand holds.
PART 4: RECOMMENDATIONS ON SETS, REPS, AND FREQUENCY
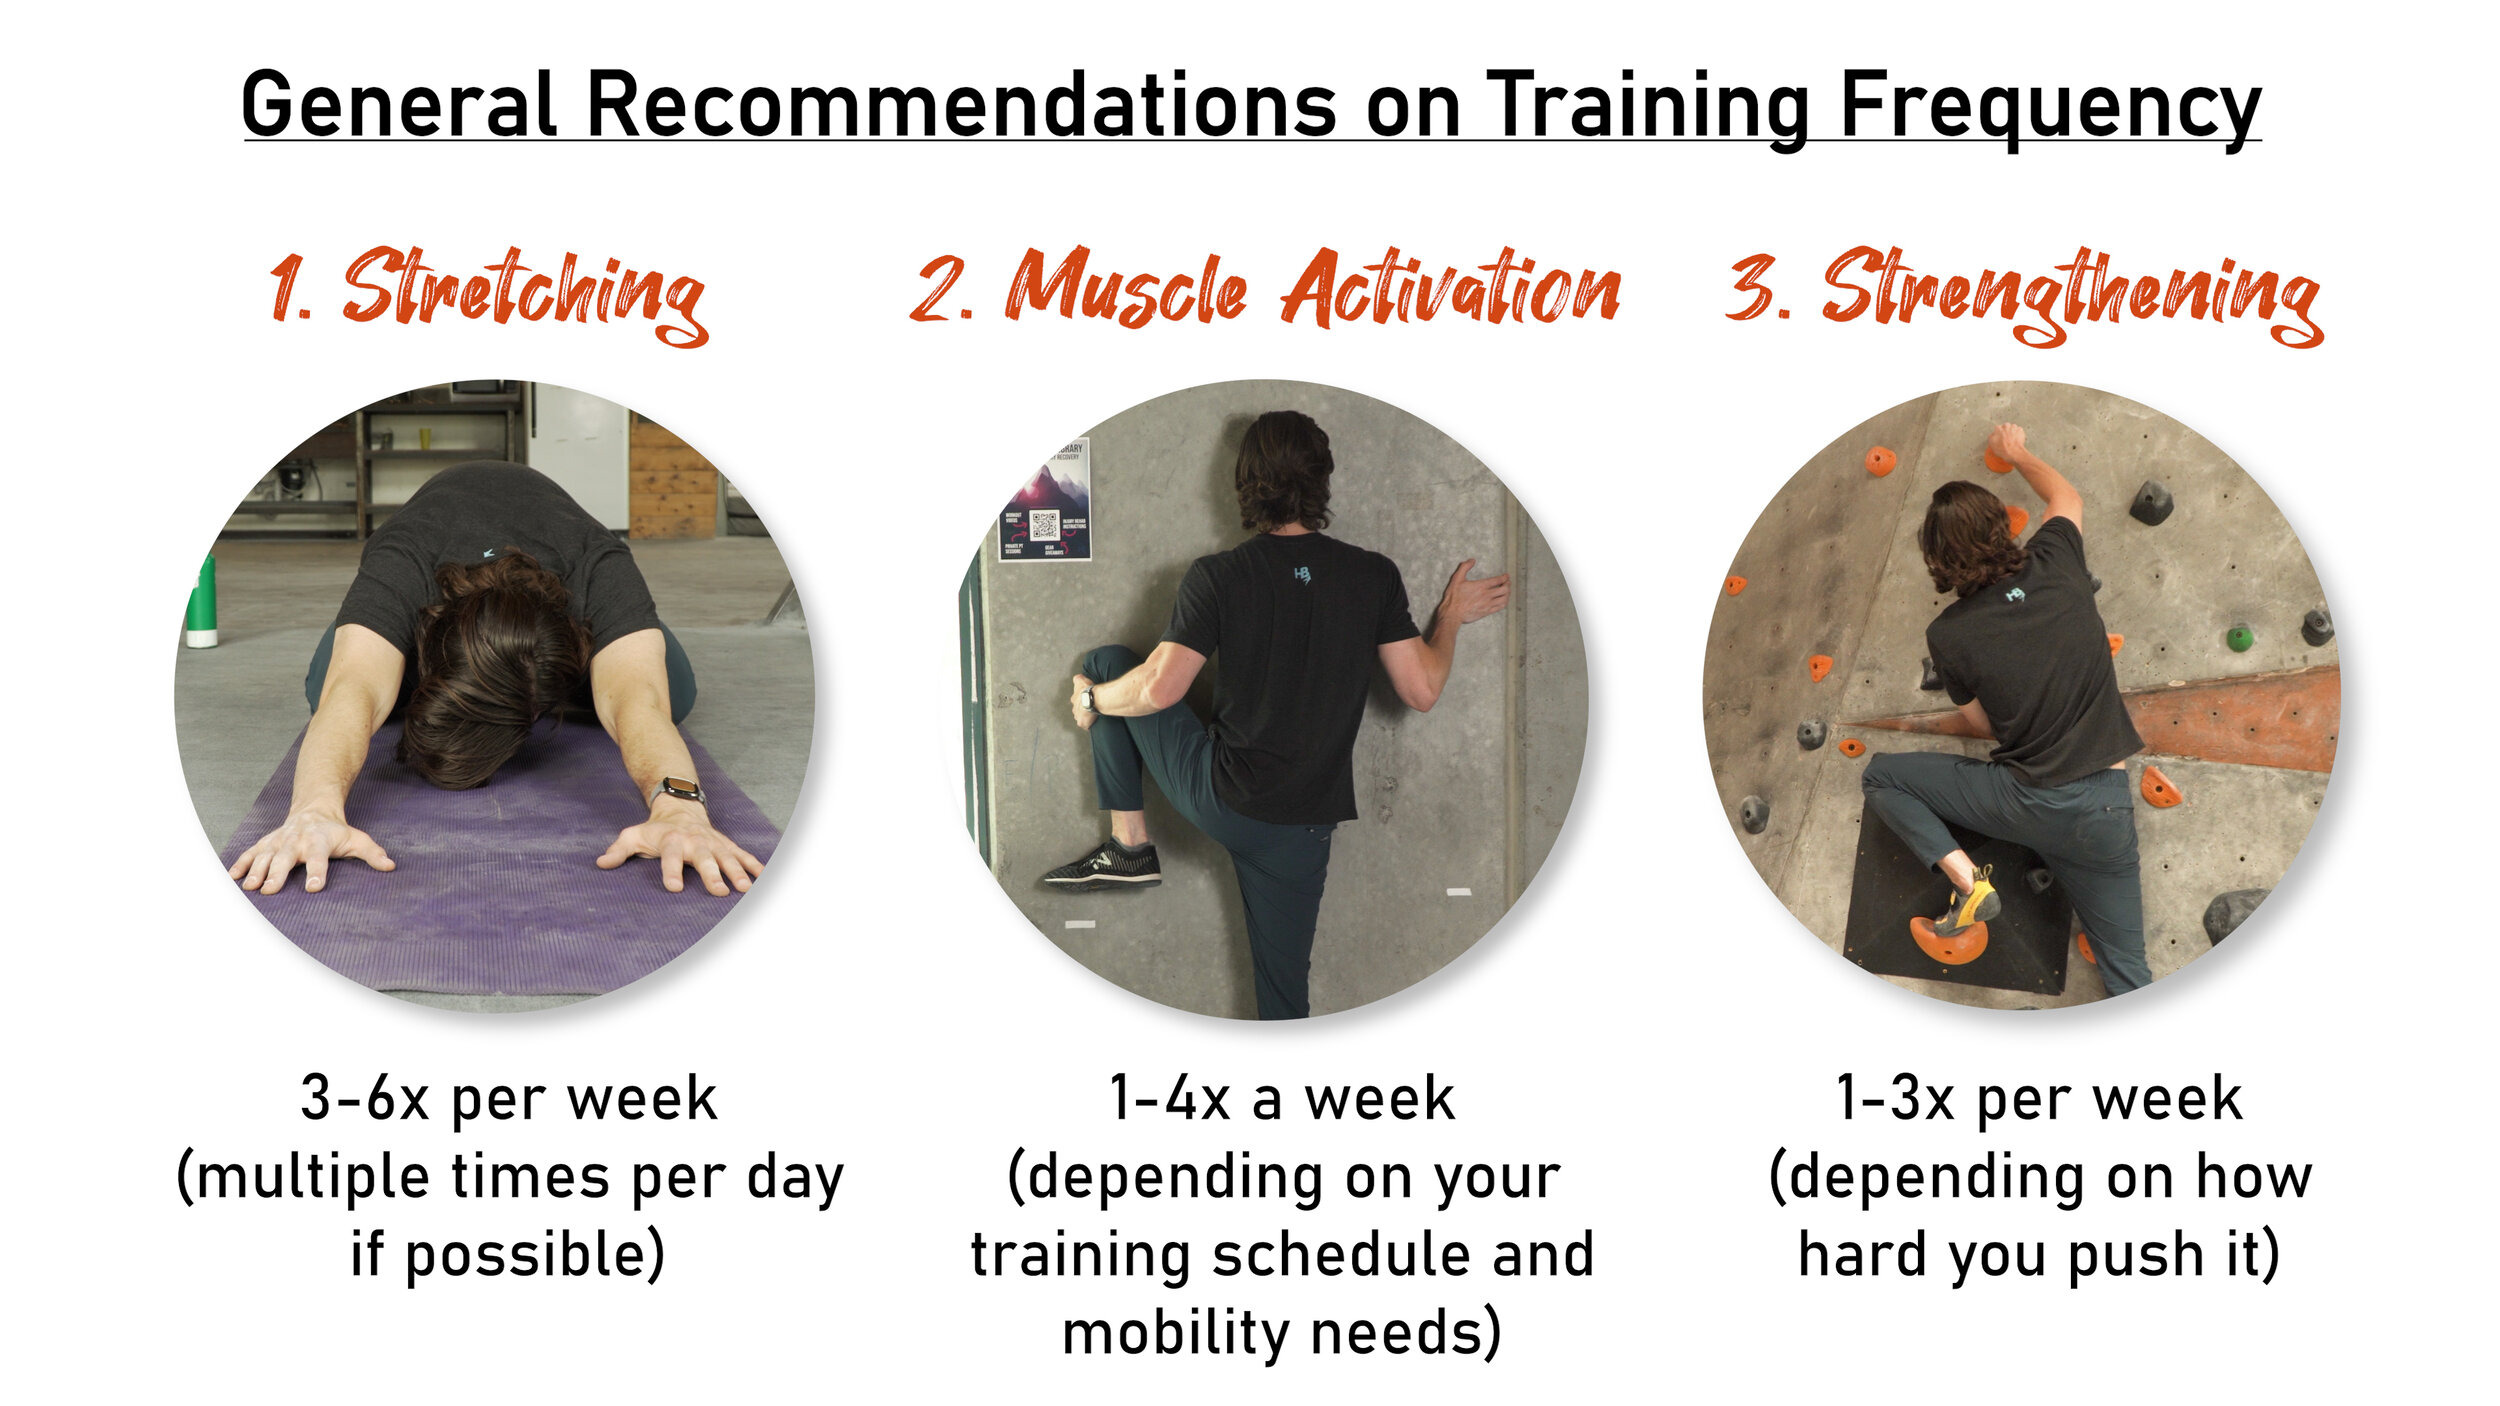
As for recommendations on how often you should do this, that needs to be based upon your goals (and your limitations!). The stretching itself can be performed multiple times a day. The active & end range activities can be performed at most every other day, or more conservatively about 3 times a week. The strengthening should be performed at a more limited frequency, ranging from 1-3x a week.
A good recommendation would be to perform the stretching at least 4 -5times a week (6 would be great!). Perform the active & end range activities twice a week after the stretching. And perform the entire sequence, including the strengthening, once a week. We don’t need to be pistol squat master, we just need to be familiar with the technique.
There will be variability in this frequency, of course, based on the individual and their needs, but you’ll still see gains just by doing the three stretches consistently and the full routine once.
OUTRO
Reminder: footwork is a complex subject as there are many different techniques a climber needs and yes, each subject could benefit from their own video. Besides technical knowledge/intuition, your ability to execute good footwork is determined by flexibility, strength, and coordination in your hips, legs, and core! Improving these areas can increase your climbing ability WITHOUT having to add in or rely on a huge amount of upper body strength.
I hope you found this video to be beneficial. If so, please like and subscribe and hit that bell to be notified of any future videos!
Until next time. Train those high feet. Climb the project while basically not even using your hands because you’re just so good at your newly learned footwork. Send it while you sip on some coffee. Repeat!
Disclaimer
As always, exercises are to be performed assuming your own risk and should not be done if you feel you are at risk for injury. See a medical professional if you have concerns before starting new exercises.
Created by Jason Hooper (PT, DPT, OCS, SCS, CAFS) & Emile Modesitt
IG: @hoopersbetaofficial
IG: @emile166